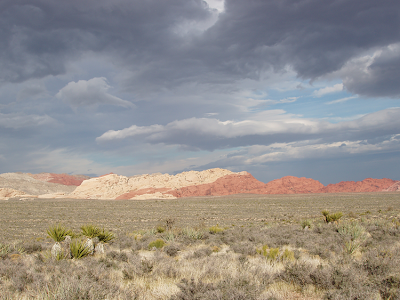
This is a pretty nice photo I took out at Red Rock Canyon. I liked the proportions of the sky to the ground and the calico hills in the distance. But the colors look a little washed out and the effect is kind of "hazy", which was not how I remembered it looking.
So I thought I'd see what I could do to improve it with Levels. I selected Image -> Adjustment -> Levels:
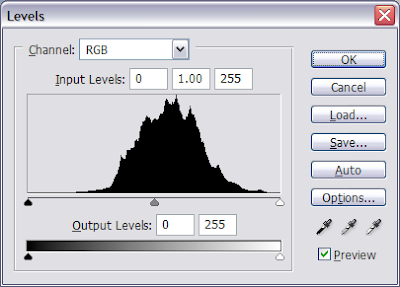 This histogram looks somewhat like a Bell curve, with the ends tapering off and becoming level at the ends. So it's a good candidate for creating contrast with this tool, because you can "lop off" the flat ends without losing detail.
The idea is to pull in the sliders along the flat parts of the curve. Below are the settings that I chose. Note the Preview box is checked, allowing me to see the changes to the image as I moved the sliders. This helps to eliminate the guesswork:
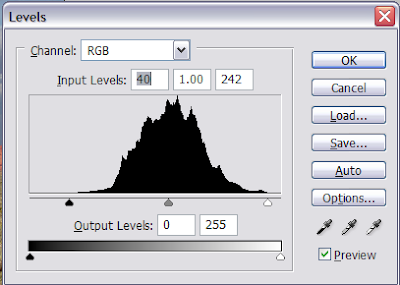 Note the values in the Input Levels boxes: 40 (an increase of 40 from the initial value of 0) on the left and 242 (a decrease of 13 from the initial value of 255) on the right. Sometimes you might want to adjust the center slider a little, to bring the overall picture a little bit lighter or darker, but that was not necessary here. So here is the result:
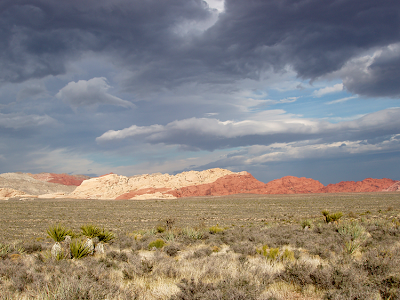 As you can see, this very simple adjustment created a more dramatic image. Although I usually try to avoid large adjustments -- 40 is a lot! -- in this case, I thought it worked out very well.
The main thing to remember is that this method for increasing contrast works best when you have flat "tails" at the end of the histogram. If you are lopping off parts that aren't flat, then you are also losing details.
Happy Photoshopping!

